10.31.2013


10.28.2013


10.16.2013
WTH?
What planet are my boys from? Buzzy went over to the counter to serve himself a second helping of dinner. He picked out every remaining brussels sprout from my "hippie risotto" and plopped them into his bowl. Newton is wailing because now he won't get any more.
10.12.2013

Time for Birthday Pancakes!
On their actual birthdays, I do up the heck out of the kitchen for a special breakfast. Can't wait for Buzzy to get up!


Not bad for under 15 bucks, if I might say so myself!


Not bad for under 15 bucks, if I might say so myself!


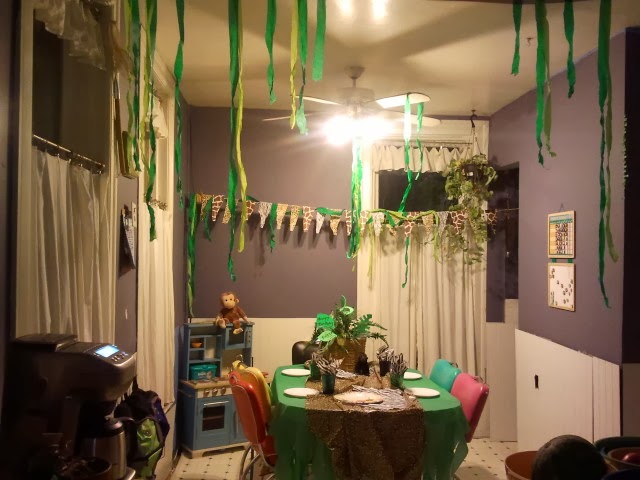
Success!
Buzz's Paleo Party was awesome! The kids rocked the hunt for the tools and, in spite of my worries that they were gonna pop the bones out in 2 seconds flat, as Papa put it, the did it like they saw the movie and read the book! Dusting and picking away like pros. Buzzy had spent the last few days contemplating what to name the species...Buzzasaurus... Buzzaraptor...Barcanodon... He wound up naming after the little girl at the party that truly wants to be a paleontologist. Meet the Emmaraptor:


10.04.2013
Pinatas-a-plenty
Started the pinatas for the paleontology party, a dinosaur egg pinata, and the pirate party (in two weeks) which is a cannonball. Do you see a theme emerging? That's right! Our pinatas are always round!
First of all, I have a weird thing against kids beating any animal/cartoon/living thing effigy... So, homemade pinatas it is! I also made a vegan pinata for a friend this way (no glue).
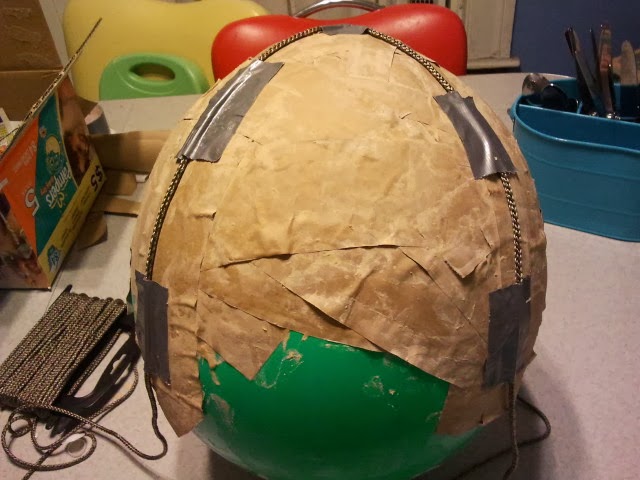
So, start with one of those large punchy balloons. Inflate to your desired size and tape the belly buttons down on both sides. Balance it on a wide cup, bowl, whatever. Make a thin paste of water and flour. Cut strips of paper... I use thick brown packing paper for this first part because I like a sturdier pinata that stands up to a few cracks. Dip the strips, pull 'm through two fingers to remove the excess and lay 'em on the balloon. I essentially make a basket... covering about 1/3 of the balloon and 4 strips up just past the middle. This is now the bottom of the pinata. For an egg shape, you'll need to do a large balloon and a smaller one that will eventually be the top of the egg.

Let this dry. Not with a hair dryer, not in the sun, an oven, or any heat source. This will expand the air in your balloon and crack your pinata. A fan is fine.
Place the balloon on your stand, bottom side up. Cut two lengths of rope or cord, each long enough to encircle the balloon plus 2 inches. I look for thin, flattish nylon cord because again, it needs to take a few whacks. Lay centers if the cords in a cross on the center of the 'basket', draping the ends down to the 4 'handles.' Tape down the center and a few spots down the length of the cord.

I use strips of newspaper for thus part. Paper the entire balloon. Cover it once for little kids, 1.5 times for older kids and twice for adults. Allow the cord to remain out of the paper at the widest point of the balloon. Hang and let dry.

NEXT UP: finishing yer pinata...
First of all, I have a weird thing against kids beating any animal/cartoon/living thing effigy... So, homemade pinatas it is! I also made a vegan pinata for a friend this way (no glue).
So, start with one of those large punchy balloons. Inflate to your desired size and tape the belly buttons down on both sides. Balance it on a wide cup, bowl, whatever. Make a thin paste of water and flour. Cut strips of paper... I use thick brown packing paper for this first part because I like a sturdier pinata that stands up to a few cracks. Dip the strips, pull 'm through two fingers to remove the excess and lay 'em on the balloon. I essentially make a basket... covering about 1/3 of the balloon and 4 strips up just past the middle. This is now the bottom of the pinata. For an egg shape, you'll need to do a large balloon and a smaller one that will eventually be the top of the egg.

Let this dry. Not with a hair dryer, not in the sun, an oven, or any heat source. This will expand the air in your balloon and crack your pinata. A fan is fine.
Place the balloon on your stand, bottom side up. Cut two lengths of rope or cord, each long enough to encircle the balloon plus 2 inches. I look for thin, flattish nylon cord because again, it needs to take a few whacks. Lay centers if the cords in a cross on the center of the 'basket', draping the ends down to the 4 'handles.' Tape down the center and a few spots down the length of the cord.
I use strips of newspaper for thus part. Paper the entire balloon. Cover it once for little kids, 1.5 times for older kids and twice for adults. Allow the cord to remain out of the paper at the widest point of the balloon. Hang and let dry.

NEXT UP: finishing yer pinata...
Finishing the Pit!
Yesterday, I dug out and sifted out the rocks and debris from a 4'x4'x1' area in the yard. It had already been in use as the 'diggin pit' in an effort to stop the 3 boys from diggin the whole yard. Now they have a really cool pit.
Today, I buried the foam fossils tamprd it all down gently and then sprayed it all down with the hose to really get the dirt diwn in there.
Tomorrow, I'll add a light layer of dirt, but still leave some fossil exposed.


Today, I buried the foam fossils tamprd it all down gently and then sprayed it all down with the hose to really get the dirt diwn in there.
Tomorrow, I'll add a light layer of dirt, but still leave some fossil exposed.


10.03.2013
Making dino fossils


BIGGEST PIECE OF ADVICE: Wear rubber or latex gloves! This stuff is insanely sticky and instantly bonds to whatever it touches. For the love of all that is good, wear gloves!
Also, do this outside, duh. Sez that right on the can.
I covered a large garbage can with waxed paper and then applied some "large gap" expanding foam insulation. It took about 4 cans ($3.50 ea) to do a complete skull, 6 ribs and 2 femurs. I thought I shouldn't just lay out stripes for the ribs, but built them up in several squiggly passes...maybe that'll make them a little less likely to crack immediately?
SECOND PIECE OF ADVICE: If you get this sh-tuff on you, do not attempt to 'dust' it off of your hand with dirt. This forms a semi-permanent dirt putty that will take days to wear off. Not even the beloved baby wipes help.
Next, I sprayed out an outline of a skull on more waxed paper and started building it up. Can't really build up too much 'cause it expands and sags a bit, but you can rough it out. I left some gaps for the nostril and eye socket and built up some areas for horns.
I let it dry for about 6 hours and then carefully removed the waxed paper to let the bottoms dry. Watch out for wet spots! Seriously! Occasionally, little blobs broke through the surface and expanded and dried. But the last step was refining the shapes, carving out the eyesocket and nostril, cutting off any blobs, etc. Done. Well, apparently, not all foam is a loverly fossil-shade of ivory like mine was. If it's a wonky color, spray paint. Then, Really Done.
10.01.2013

Subscribe to:
Posts (Atom)